How To Preserve Wedding Flowers

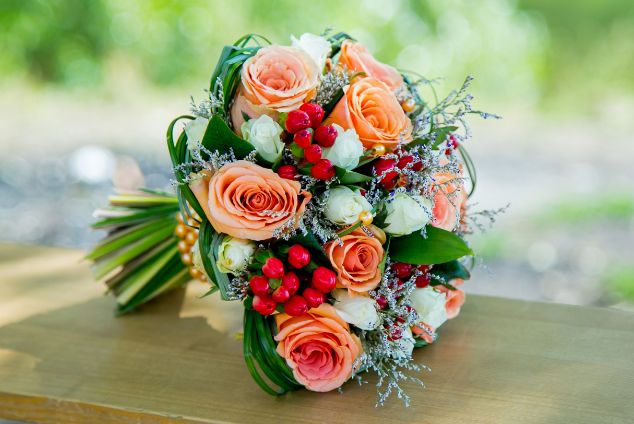
If you’re about to get married or have recently gotten married you’ll be aware of how much planning goes into your special day. Picking the right date, a beautiful venue, the extra special wedding dress, the bridesmaid’s dresses, the guest list, the food, and of course the all-important flowers. It’s also a given that you have / will have (if you’re reading this before your wedding day) many photos, and other treasured keepsakes to remind you of just how special your day was or will be. But how do you keep the beauty of your wedding bouquet intact?

Unfortunately, the beautiful fresh flowers from your special day are living organisms and unlike photographs, they cannot be displayed indefinitely. Sadly, over a short time frame, they will wilt and bruise slowly, before ending up in the compost pile. But what if there were ways to preserve your wedding day flowers? Well, thankfully there are. A number of ways in fact.

We offer a range of bespoke wedding day flower bouquets and arrangements. If you’d like to speak to one of our florists about any of the techniques discussed in this blog, or any of our wedding services please call us on 01273 770966.

Two ways to preserve your wedding bouquet

Before we go into the details of our favourite flower preservation methods, here are our top tips to help ensure that you achieve the best results possible, regardless of which method you choose to use.

  • The sooner the better! The quicker you begin the preservation, the better the results will be
  • Avoid the toss! Consider avoiding the traditional wedding bouquet toss (or replace your bouquet with an extra) to avoid damaging your delicate flowers
  • Keep away from direct sunlight! The heat from the sunlight can lead to shrivelling, wilting or drooping buds

Drying flowers

We think dried flowers look fantastic! They require no effort in order to maintain their beauty and they can last for more than a year (even longer if you choose to bleach and dye them). There are three widely used techniques for drying flowers:

Air drying

Although time consuming, air drying flowers is one the most simple and eco friendly methods of preserving flowers. In order to air dry flowers you’ll need:

  • Elastic band(s)
  • Something to hang your flowers from, ie. coat hangers or pegs
  • A cool, dark space to hang your flowers
  1. Trim any excess foliage from the base of the stem
  2. Bunch your flowers into groups of 4 or 5 using an elastic band (you can hang your flowers individually if preferred)
  3. Hang your flowers upside down from your coat hangers or pegs in a cool, dark space. Cupboards, wardrobes or unused rooms are ideal
  4. Let your flowers dry for 1-2 weeks. You’ll know that they’re ready when the petals and flower heads rustle when touched
Hanging dried flowers

Desiccant drying

You will no doubt have come across those little silica gel packets in shoeboxes, right? They are what’s known as desiccants. Desiccants are products which are designed to remove water and moisture, reducing the risk of potential damage to products as a result of humidity. Neatly, they can be used to do just that when used to dry your flowers. You’ll need:

  • An airtight container
  • Your chosen desiccant, silica gel works great
  • Something soft to clean the gel from your flowers
  1. Trim any excess foliage from the base of the stem
  2. Fill the base of your container with your chosen desiccant and submerge your flowers
  3. Seal the container and allow your flowers to dry for about a week
  4. Using a soft brush remove the gel beads from your flowers and you’re ready to go!

Microwave drying

Want your flowers dried in a hurry? Then the microwave method of drying flowers might be the right one for you. Your prized flowers could be dry and ready for display in as little as ten minutes! You’ll need:

  • Microwave
  • Microwave safe container
  • Your chosen desiccant, again, silica gel works great
  • Water
  1. Fill the base of your container with your chosen desiccant and submerge your flowers (TOP TIP: group your flowers together by type, different flowers will dry at different speeds)
  2. Place your microwave safe container of flowers in the microwave alongside a cup of water
  3. Zap your flowers for 10-30 seconds at a time and check regularly on the drying process
  4. IMPORTANT: Once you’re happy that everything has dried thoroughly, allow your containers to cool before attempting to remove your flowers. Silica gel can get very hot!
  5. Once everything has cooled you can remove your flowers, dust off the gel and away you go!

Pressing flowers

Pressing your flowers is another great (and super simple) way to preserve them so that they can be enjoyed for years to come. There are a few different ways to press your flowers, from the super simple to the super speedy.

Pressing flowers using a book

This is the simplest but certainly the longest method when it comes to flower pressing. If you’re in no rush and don’t want to run the risk of burning your treasured blooms you’ll need:

  • Wax or parchment paper
  • A large, flat heavy book(s), preferably books that you don’t mind damaging ever so slightly
  1. Lay your wax or parchment paper over two pages of your chosen book
  2. Place flowers face down on the page and close the book
  3. Place additional books (or other forms of weight) on top of your book press
  4. Let gravity do its thing! Check on your flowers periodically (perhaps once a week) and change out the damp wax or parchment paper for fresh, dry paper
  5. Depending on which flowers you’re drying the process can take anywhere between ten days and a few weeks

Pressing flowers using a flower press

This method follows the same principle and steps as the book method, the only difference being that a flower press can be manually tightened and therefore doesn’t require additional weight to be placed on top of it.

It is possible to press flowers using parchment paper and an iron, which can reduce the timescale to a matter of minutes. However, be warned that doing so does run the risk of bleaching your beloved flowers, and it is challenging to avoid creating a ‘ripple effect’ (much like damp paper) when using this method.

Pressed flowers can easily be displayed in photo frames on their own or as extra details alongside your wedding photos. We hope you’ve found this guide to preserving your wedding flowers helpful and that it has inspired you with ideas of how to bring some of the beauty from your special day into your every day.

If you’d like to know more about our wedding flower services or preservation techniques. We’d love to hear from you!

Call us on 01273 770966. Email us at [email protected]. Use our online contact form or drop in and say hi at our shop on Western Road, Brighton!

Leave a Reply

Your email address will not be published. Required fields are marked *

Sign up to our mailing list and get £5 off your first online order when you spend £25 or more

Sign Up Now

By signing up you agree to receive marketing emails from The Brighton Flower Company